
Data retrieval
How to get your customer E-KYC data back
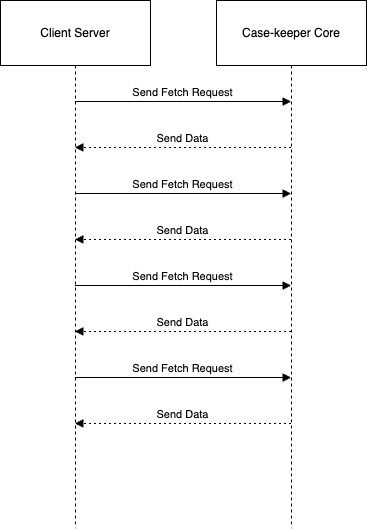
Interval Fetch
To retrieve data from our services using API, you will need an access token from Keycloak. Here's how to get started:
-
First, log in to Keycloak and navigate to the Authentication section.
-
Once you have your access token, you can use it to make requests to our backend API. Specify the endpoint you want to retrieve data from, along with any required parameters.
-
To automate the process and ensure that you're retrieving data on a regular interval, set up a cron job or other scheduling mechanism to make the API request at the desired frequency. This will ensure that your data is always up-to-date without requiring manual intervention.
-
This can be done from both front-end or back-end depending on the use case
In summary, obtaining an access token from Keycloak and setting up a scheduling mechanism to make API requests at regular intervals is a simple process that will keep your data up-to-date and accurate.
NOTE: Using this method is not recommended as it uses up server resources. Additionally, when performed on the front end, it can negatively impact the performance of the application.
Webhook
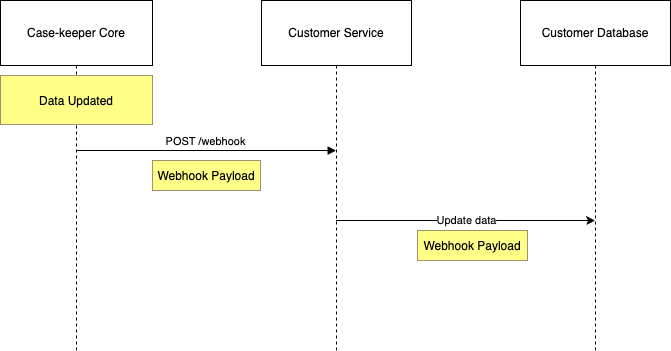
Case-keeper Core provides a powerful feature called Webhook Integration that allows seamless communication with external systems or services. With this integration, Case-keeper Core can automatically send data to customer service whenever there is an update to the data within the system.
How it Works
When data is updated within Case-keeper Core, the system automatically triggers a webhook event. This event serves as a notification to inform external systems, in this case, Customer Service, about the recent data update. The webhook event includes relevant information about the updated data, such as case details, timestamps, or any other data that needs to be conveyed to customer service.
Upon receiving the webhook event, Customer Service processes the data and takes appropriate actions based on the updated information. For example, customer service representatives may use the updated data to provide timely and accurate support to customers.
Webhook Configuration from Case-keeper Dashboard
To enable the webhook integration in Case-keeper Core, you can conveniently set up and manage it from the Case-keeper Dashboard. Here's how:
Log in to your Case-keeper Dashboard using your administrator credentials.
Navigate to the Webhook Settings section in the Dashboard.
In the Webhook URL field, enter the endpoint URL provided by your Customer Service team. This is the URL where Casekeeper Core will send the webhook payload.
Save the configuration to activate the webhook integration.
That's it! Now, whenever data is updated in Case-keeper Core, the system will automatically send a webhook payload to the configured endpoint URL, notifying Customer Service about the changes.
Payload Format
The payload sent through the webhook contains essential data fields related to the updated case or information. The payload format is designed to be easily interpretable by the Customer Service system, facilitating seamless data processing on their end. The specific payload format can be customized to suit the requirements of your Customer Service system.
//TODO: Add how to read webhook data link